ShopDreamUp AI ArtDreamUp
Deviation Actions


Suggested Deviants


Suggested Collections


You Might Like…


Featured in Groups


Description
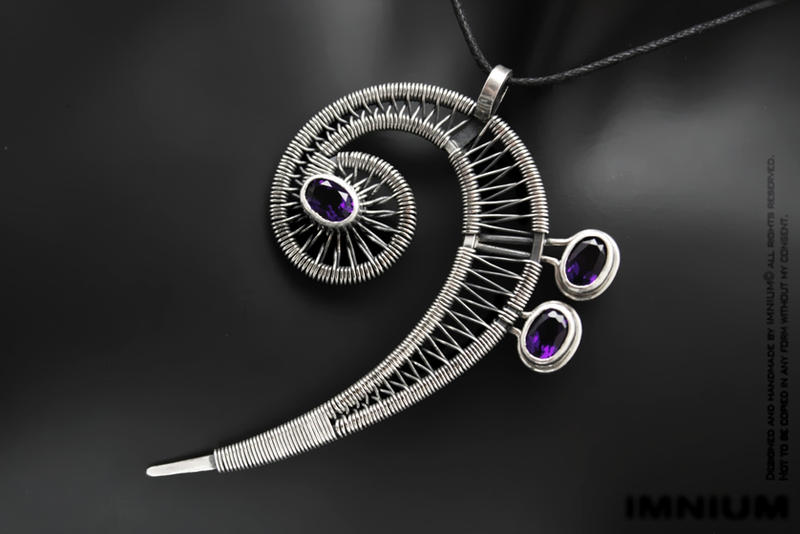
Available here: www.etsy.com/listing/180313203… 
All photos are high resolution and I tried to keep them as light as possible to make the tutorial printer friendly if you decide to print it
Skill level: i'm gonna go with advanced but you might find it to be less difficult, it all depends on what you are used to making
This is from the tutorial:
Prior knowledge needed (not taught in this tutorial):
• Intermediate soldering
• Stone setting (stepped bezel)
• Hammering
• Filing
Tools needed:
- Soldering equipment
- Chain nose pliers (the ones with a narrow tip)
- Round nose pliers
- Whichever cutting tool you like
- Hammer and anvil (or 1 big and 1 smaller hammer)
- Whichever stone setting tools you prefer - burnisher or a pair of larger nail clippers
- Flex shaft or a nail polisher with a rough, conical tip/bur (for the stepped bezel)
- Various jewelers files
- Polishing tabs and/or cloths
- A printer or paper+pencil (for printing or drawing the bass key shape)
- A sharpie or permanent marker
Materials:
- 28cm (11.2“) of 16ga (1.3mm) half hard round sterling silver wire
- 260cm (104“) of 25ga (0,45mm) dead soft round sterling silver wire
- 3x28mm of 1/4x28ga fine silver bezel strip
- 4x25mm of 2x1mm rectangle sterling silver wire
- 5+3cm (2“+1.2“) of 18ga (1mm) half hard round sterling silver wire
- 3 oval faceted gemstones, I used 8x6mm amethysts
- Solder or solders and adequate chemicals (if needed for your solder of choice), pickle – bought or home made
- Optional: oxidizing agent (liver of sulphur or something similar)
You can use 26ga wire instead of the 25ga wire for wrapping but you will need a bit more, probably about 5“ depending on your wrapping skills and wire pliability.
The quantities noted here are approximate because the length of wire you will need to wrap this pendant depends on: pliability of the wire, how tightly/neatly you wrap, how thick are the wires used.
If you are a beginner or if your wire is half hard you will probably need more of it. I have also noticed a difference in sterling and fine silver – I need less fine silver wire to wrap the same thing (the fine silver wire was a lot softer and I was able to use less of it by wrapping it completely tight). If you are not sure better cut a much longer piece of wire than noted here – it is very difficult to seamlesly add more wire in this design.
The gemstones do not have to be oval or faceted or the same size as noted here but if you do use different stones you will need to adjust the material quantities accordingly. You will also need to know how to set them - alternative stone settings will not be explained in this tutorial.
You can use any kind of solder you prefer and clean the soldering residue however you see fit (pickle, sanding, etc. ). I used Rio Grande paste solder and cleaned the residue manually, without chemicals.
Image size
1181x787px 356.03 KB
Make
Canon
Model
Canon EOS 450D
Shutter Speed
1/41 second
Aperture
F/5.6
Focal Length
55 mm
ISO Speed
800
Date Taken
Oct 30, 2013, 11:56:55 PM
Lens
EF-S18-55mm f/3.5-5.6 IS
Sensor Size
22mm
© 2014 - 2024 IMNIUM
Comments6
Join the community to add your comment. Already a deviant? Log In
amazing necklace